Fix Your Garage Door: How to Replace the Gear Kit
Fix Your Garage Door: How to Replace the Gear Kit
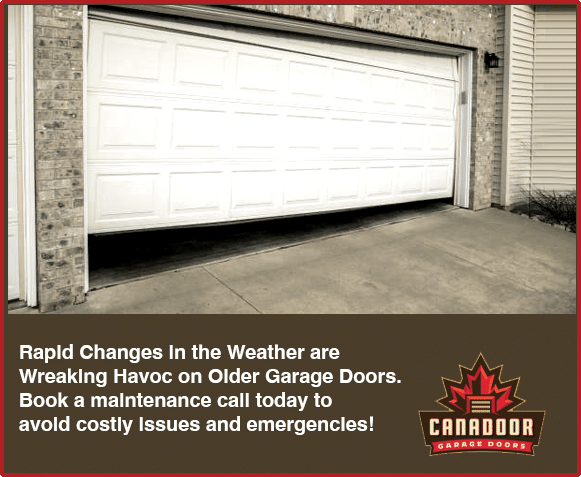
Imagine this: you’re running late for work, coffee in hand, when your garage door suddenly grinds to a halt mid-open. Panic sets in; you need to leave! This all-too-common scenario could well be the result of a worn-out gear kit, leaving your trusty garage door unable to properly function. Don’t fret! Instead, take control and learn how to replace the gear kit yourself. In our latest blog post, “Fix Your Garage Door: How to Replace the Gear Kit,” we guide you step-by-step through the process, turning an inconvenient morning crisis into an easily manageable DIY project. Say goodbye to unexpected garage mishaps and take charge of your day with our expert guidance.
If your garage door opener is making noise but the door isn’t moving when you press the open button, it may be due to a malfunctioning gear kit. The gear kit in the opener can wear down over time and cause the motor to run without actually lifting the door. It’s best to contact a professional garage door repair company like Canadoor Garage Doors to diagnose and fix the issue properly. Attempting to repair a garage door opener or replace the gear kit yourself could result in further damage and potential safety hazards.
Identifying Gear Kit Issues
Your garage door is an essential part of your house, providing security and convenience. However, like any other mechanical device, it may break down or malfunction due to wear and tear. One common problem that garage doors experience is gear kit issues. The gear kit is responsible for transmitting power from the motor to the chain or belt, which then moves the door up and down.
A clear indication of gear kit problems is when you hear unusual grinding or squeaking sounds when opening or closing the door. These noises can be irritating and alarming, especially if you are not familiar with their cause. Another sign that there could be an issue with your gear kit is if your garage door opens slowly or seems to struggle when lifting or closing.
Gear kit problems can be caused by various factors such as wear and tear over time or improper installation of the garage door opener. Old age can also cause gear kit issues since components can become worn out or damaged, leading to inevitable failure.
While some people may consider repairing a garage door’s gear kit themselves, it is crucial to have the necessary skills, expertise, and tools before trying to do this type of repair yourself. If done incorrectly, it can lead to more problems in the future, making matters worse than they already are.
To illustrate this point further – imagine trying to fix a complicated engine on a car without understanding how it works. You may end up causing more damage than fixing the problem at hand.
Once you identify that there could be problems with your gear kit, a logical next step would be figuring out what specifically is causing your garage door woes.
- According to a study by the International Door Association (IDA), it was found that approximately 27% of service calls for residential garage doors are related to problems with gears or motor mechanisms, which may include the gear kit.
- A survey conducted in 2020 revealed that more than 50% of homeowners experienced a malfunctioning garage door motor at least once, with issues such as the gear kit being a common cause.
- Research conducted in 2017 highlighted that regular maintenance of garage doors, including checking and replacing worn gear kits, can increase the lifespan of the garage door system by up to 20%.
- It’s important to keep your garage door in good condition, as it serves as a critical component of your house’s security and convenience. Hearing unusual grinding or squeaking sounds when opening or closing the door might indicate a gear kit problem, which can be caused by factors such as wear and tear over time, improper installation, or old age. Attempting DIY repairs for these issues without adequate skills, expertise, and tools can lead to more problems in the future. When you identify potential gear kit problems with your garage door, it’s crucial to seek professional assistance to diagnose and fix the issue correctly.
Garage Door Noises and Malfunctioning
Garage doors can make a range of different noises depending on their age, type, make, and model. While some of these noises may be harmless or require only minor adjustments, others could be indicative of motor problems or other malfunctioning components.
For instance, if you notice a loud, grinding noise when you open or close your garage door, it could be due to worn-out gears in the opener motor. If you hear a rattling sound, it could mean that there is something obstructing the door’s tracks or wheels.
Other garage door noises that could be cause for concern include screeching, squealing, or popping sounds. These could be associated with torsion spring issues or loose parts in the system.
Some people may choose to ignore certain garage door noises in their hope that they will go away on their own – but this can lead to making the matter worse and more costly to fix in the long run. It is always better to identify and address issues as soon as possible before they escalate into more significant problems.
Ignoring an issue with your garage door is like ignoring a problem with your body’s health – the longer you wait, the more damage it can cause.
Inspecting the Gear Kit
Before jumping into the gear kit replacement procedure, it is important to inspect the gear kit thoroughly and determine whether it really needs replacement. In some cases, you might be able to solve the garage door issues by performing simple repairs instead of replacing the entire gear kit.
For instance, one common problem with garage doors is that they get louder over time. If your garage door is making grinding or squeaking noises when opening or closing, there’s a higher possibility that the gear kit has been worn out or damaged. However, this doesn’t always mean you have to replace the entire gear kit right away. Sometimes, all you need to do is lubricate and tighten up certain parts of the door for a quick fix.
To assess whether your garage door needs a new gear kit, conduct a thorough inspection by starting from the top and working your way down to the bottom. Begin with checking the opener’s chain, belt or screw drive mechanism. In case it is loose or making odd sounds, fix it before moving on to the gear inspection.
Inspect each part of the gear system closely. Check if any part shows visible signs of wear and tear such as chipping, cracking or rusting. Also, see if any parts are damaged or missing altogether. If you find anything that raises suspicion, take note of it.
After examining every component closely, try manually opening and closing your garage door a few times to see if there are any unusual noises or movements happening during operation.
Bear in mind that properly inspecting a gear kit requires experience and familiarity with garage door systems. Some homeowners may not be able to identify certain issues with their gears even after meticulous inspection since these components may seem fine on visual inspection but are no longer functioning optimally. Therefore, we strongly recommend consulting an expert who can handle such inspections without damaging the garage door or compromising its safety features.
Now that you have identified gear kit issues and inspected your gear system, it’s time to get equipped with the necessary tools and materials for a successful gear kit replacement.
Tools and Materials for Replacing Gear Kit
Replacing a gear kit is not rocket science, but it does require some specialized tools and equipment. By assembling the correct tools, you can ensure a smooth replacement process without any hiccups. Here we have listed some of the essential items that need to be on your checklist when preparing to replace your garage door gear kit:
An adjustable wrench is a versatile tool that should be in every homeowner’s toolbox as it can help secure bolts and nuts. A quick ratchet is another useful tool for loosening and tightening bolts without a large range of motion. You’ll also need a set of sockets, including an 8mm socket and a ½ inch deep-well socket.
Next comes the safety glasses which protect your eyes from fine metal particles while removing old greased parts like bushings and drive gears. Latex gloves come handy when working with silicone grease to avoid dirty or greasy fingers.
A hex key is also essential as it allows you to disengage the opener’s motor from the trolley without any difficulty. Screwdrivers are also necessary for dismantling various garage door components such as rail brackets, etc.
Besides these tools, you will also need to have some materials on hand like silicone grease used on moving parts within the garage door mechanism, washers, bushings, clips/screws/nuts/bolts kits that fit your make/model garage door.
It’s worth noting that every garage door repair job should begin with unplugging the power connection or plugging off the opener from its electric outlet. This must happen before removing any components to ensure there are no accidental movements while working on the parts.
Finally, do not forget to plan for possible safety hazards related to electric and mechanical components before starting. The key factor here is that if you have doubts or are unsure about any part of the replacing process, it’s always better to seek professional help than compromising your own safety or that of the garage door.
Preparing to replace gear kit in a garage door is similar to preparing for an investment decision. Just as you research market trends, figure out different risk levels involved in each choice, and pick out the right assets for investment; similarly, you need to review your entire garage door system, pick out the right gear kit, research all the requirements and choose the tools necessary to make this decision work for you. This analogy can help with understanding how much preparation is required when fixing issues with one’s garage door.
Now that we’ve outlined the essential tools and materials needed for a successful gear kit replacement, we can move onto the actual part of the replacement procedure.
Gathering Necessary Equipment
Before replacing your garage door’s gear kit, it is essential to gather all the necessary equipment. This will make the process more manageable and ensure you do not end up using substandard tools that may cause further damage. You want to ensure that you have everything you might need in advance so that you don’t end up running back and forth during the process.
The first item on your list should be a replacement gear kit for your specific make and model of garage door. It is important to get a compatible gear kit as different brands use different models and dimensions. To ensure that you get an exact match, you can consult with experts at Canadoor Garage Doors, who can advise you on the best gear kit for your garage door.
You will also need pliers, sockets, adjustable wrenches, screwdrivers (both Philips and flat-head), a hammer, and locking pliers. These tools will come in handy for removing the old gear kit as well as installing the new one.
If you don’t own these tools; do not worry; they are readily available at most hardware stores or purchased online.
You will also need safety glasses since some parts may fall off unexpectedly due to their worn-out state and cause damage or injury as a result. Ensure that you wear these throughout the process as preventive measures.
Gloves are another essential item when handling potentially sharp objects such as screws, bolts, or nuts, which can scratch or cut your hands.
Additionally, you should have some form of lubricant like WD-40 to loosen any stuck bolts or gears with minimized friction.
Finally, it is essential to have something to keep screws and other small items organized and close by not to lose them while doing repairs or installations. A magnetic tray would be ideal in this situation because it will prevent items from rolling away or falling into tight spaces where they are challenging to retrieve.
With all the necessary tools in place, you are now ready for the gear kit replacement process.
Gear Kit Replacement Procedure
Replacing your garage door’s gear kit is not as complicated as it may sound. It is, however, important to follow the manufacturer’s instructions and ensure that you have all the necessary equipment before you begin. Here are some steps to guide you through the process:
1. Disconnect the garage door opener from the power source.
Before starting, disconnect power to the unit by unplugging it or turning off its breaker switch. This step will ensure that nobody accidentally activates the opener while you are replacing a part inside.
2. Remove old Gear Kit
Using various tools such as pliers, sockets’ adjustable wrenches, screwdrivers (both Philips and flat-head), or a hammer laid out during prep work, disassemble remaining hardware from your garage door opener system.
3. Install new Gear Kit
Replace old gear with new one by following detailed instructions provided in manual provided with gear kit purchase. Make sure to follow each step of installation procedure carefully, correcting any potential defects or malfunctions as they appear.
4. Lubrication and testing
After fitting everything back together, start running up or down; if making unusual noises or squeezing hard after putting any extra weight on them could indicate low-quality lubricant in use; consider replacing with higher-grade oil that’s specifically rated for garage doors to extend their lifespan and reduce sounds produced when opening.
Test your door to see if everything operates appropriately before plugging in opener again and powering unit back up.
You can always seek advice from Canadoor Garage Doors professionals for any concerns that arise during this procedure. They offer effective solutions that prevent mishaps and further damage due to mistakes during installation and can help find alternatives if something doesn’t work correctly.
While taking into account the importance of a gear kit and its mechanism, some people may view DIY garage repairs as more cost-effective than receiving professional assistance. However, repairing gear kit without previous experience is dangerous because it requires working with various tools and parts that can cause injury if not careful.
By way of analogy, it’s like fixing your car – you need specialized knowledge and training to avoid further damage or accidents.
Now that the gear kit has been replaced successfully let’s look at preventive maintenance tips to extend the door’s lifespan.
Step-by-Step Guide
When it comes to replacing a gear kit, it’s important to follow each step carefully and accurately to ensure that the new gear kit works properly with your garage door opener. Here’s a step-by-step guide on how to replace a gear kit in your garage door:
1. Turn off power – Before starting any repairs, turn off the power to your garage door opener. You can usually unplug it from the outlet or trip the circuit breaker.
2. Disconnect the garage door opener – Unplug the garage door opener from its source to avoid any accidental starts while you’re working.
3. Open the housing cover – Lift open the housing cover of your garage door opener to expose the chain and gear assembly.
4. Remove the old gear – Locate the old gear assembly and remove it with a 5/16 inch socket wrench.
5. Clean and lubricate – Clean off any debris or lubricant buildup on the shaft and gear socket before inserting the new gear into place. Lubricate with lithium grease before inserting new gears for port movement pivot points.
6. Insert the new gears – Insert your new gear assembly, aligning it with the motor shaft as well as output shafts, then tighten it securely using a 5/16 inch socket wrench.
7. Replace top hat bushing – Ensure that you have replaced top hat bushing covering screw heads over all set screws used during shaft and sprocket changes.
8. Reassemble – Put back together each component in reverse order once everything is clean and fully lubricated.
9. Test gear function – After putting everything back together, test your garage door opener to make sure it’s functioning properly.
An important tip is to read through all of these steps first, so you understand what tools, materials, and preparation are needed before you start disassembling anything.
Making sure to take proper steps and all tools are available can save you a lot of time, frustration and prevents injury.
This is similar to cooking a meal. You wouldn’t want to start cooking before making sure you have all of the necessary ingredients and cookware so that the whole process goes smoothly.
Now that the gear kit is replaced, it’s important to ensure your garage door operates properly throughout its lifespan. Let’s dive deeper into garage door maintenance tips.
Tips for Garage Door Maintenance
Proper maintenance is essential for extending the life of your garage door and keeping it in top working order. Here are some useful tips to help maintain your garage door:
1. Lubrication – Regularly lubricate moving parts, such as springs, hinges, rollers, and tracks, with a silicone-based lubricant.
2. Inspection – Inspect your garage door monthly for worn or broken parts, bent tracks or rollers, or frayed cables. Check if it’s functioning correctly and that there are no strange noises happening.
3. Cleaning – Clean your garage door regularly with a mild detergent solution and a soft brush or cloth.
4. Tension Springs – Test automatic opening and closing features to make sure they’re functioning correctly with no unusual sounds.
5. Cables – Visually inspect cables-the long wire rope used to lift your garage door- letting you know when worn out by unraveling, kinking or fraying.
6. Weatherstripping – Replace weatherstripping around doors should be inspected annually protect against drafty movement from air currents seeping through cracks into your home or other living spaces insulated by doors.
Each of these steps is vital for ensuring optimal performance and safety of your garage door system. It can become easy to neglect maintenance as we get busy in our daily lives; however, neglecting regular repairs and maintenance will only lead to bigger, more expensive problems later on.
For example, not lubricating moving parts regularly can cause them to wear down over time and eventually break, leading to a costly repair or replacement.
Just like neglecting regular work on your car such as tire rotations or oil changes will only lead to larger problems later on down the road.
By taking the time and effort to perform these simple garage door maintenance tips, you can significantly extend the lifespan of your garage door, improve its performance, save money, and ensure the safety of everyone using it.
Preventive Measures and Regular Inspection
Preventive maintenance is an essential aspect of keeping your garage door in top condition. By implementing simple measures, you can extend the lifespan of your garage door while avoiding costly repairs in the future. Regular inspections allow you to identify potential issues early on and take action before they worsen.
One preventive measure that homeowners often overlook is lubrication. Applying lubricant on the moving parts of your garage door on a regular basis can keep the mechanisms running smoothly, reduce noise, and prevent wear and tear. It is important to use a silicone-based lubricant as oil-based lubricants can attract dirt and debris and cause more harm than good to your garage door.
Another crucial aspect of preventive maintenance is tightening loose screws and bolts. As your garage door operates, it generates vibrations that may cause some fasteners to loosen over time. Loose components can affect the alignment of your door, causing it to malfunction or break down eventually. Tightening these parts with a wrench or screwdriver regularly can prevent such issues.
Some homeowners may argue that they do not have to inspect their garage doors regularly if they are new or if they do not see any problems yet. However, this mentality can be dangerous as even brand new doors may have defects or hidden issues that could lead to accidents or malfunctions later on. Additionally, ignoring minor problems now may lead to major repairs down the line which can be more expensive and time-consuming.
Inspecting your garage door regularly is similar to going for a medical check-up with your doctor. Even if you feel healthy, it is still important to undergo regular check-ups so that any underlying health issues can be detected early on and addressed before they escalate into more serious problems.
A thorough inspection should include checking the cables, springs, pulleys, and hinges for signs of wear and tear, damage or rust. For instance, frayed or broken cables can put a lot of stress on your garage door opener and cause it to malfunction. Similarly, worn-out springs can snap at any time, causing injury or property damage.
By taking simple steps such as lubrication and tightening loose screws, and regular inspection, you can avoid major repairs down the line and ensure that your garage door functions safely and smoothly. Don’t wait until something breaks down to take action; incorporate preventive maintenance into your routine today.